
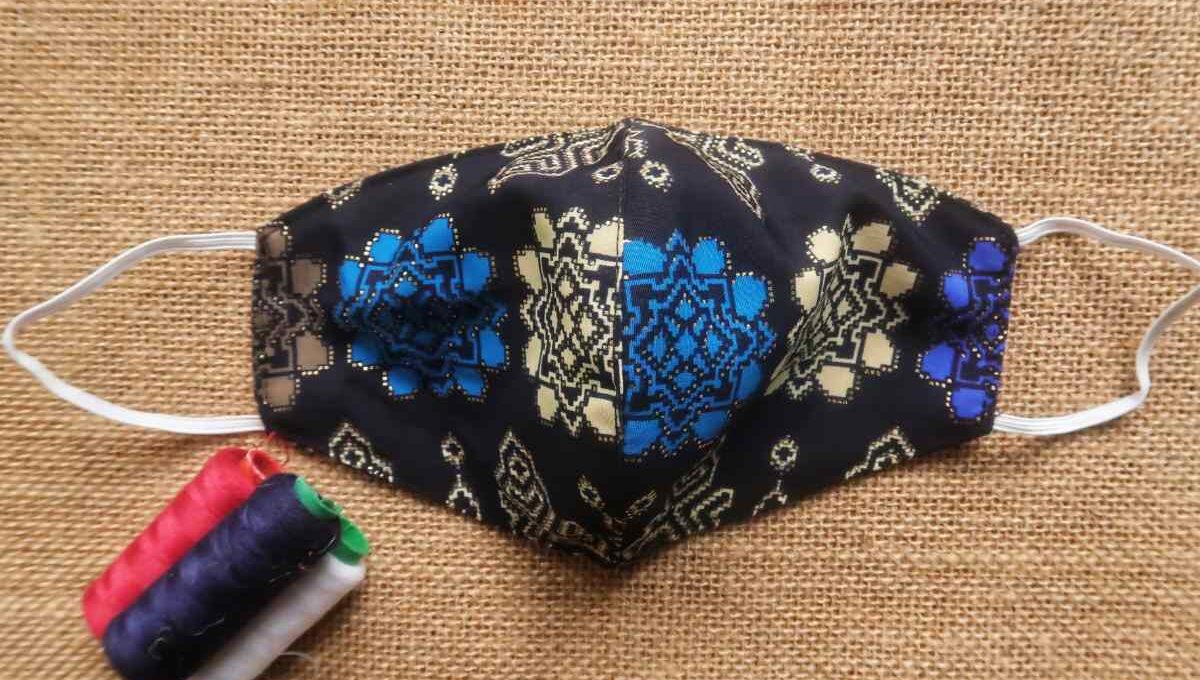
In a market overflowing with standard-printed face masks, embroidered face coverings stand out as a symbol of craftsmanship, luxury, and lasting quality. With consumers becoming more selective—looking not only for protection but also for self-expression—embroidered masks fill a niche that blends safety with personal style.
Table of Contents
What makes this opportunity even more accessible is the Print-on-Demand (POD) business model. You don’t need a warehouse full of inventory or expensive equipment. With POD, you can start your own embroidered face mask brand without upfront investment in materials or production. In this detailed guide, we’ll walk you through every step—choosing the best POD provider, designing professional embroidery files, setting up your store, and marketing your product like a pro.
Why Embroidered Face Coverings?
Printed face masks have become a common promotional and fashion item—but they often fade, peel, or look mass-produced. Embroidered masks, on the other hand, offer a durable, textured, and premium alternative that doesn’t lose its appeal over time. The stitching adds dimension, and the product instantly looks more exclusive.
Use cases include:
- Corporate branding: Embroider logos for employee uniforms or corporate giveaways.
- Luxury fashion: Offer limited-edition drops in elegant fonts and designs.
- Fundraising & social causes: Create stitched messages or symbols for nonprofit campaigns.
- Event merchandise: Weddings, sports teams, and conferences love customized accessories.
When marketed correctly, embroidered masks can command higher retail prices, yield better profit margins, and result in lower return rates due to quality perception.
Step 1: Choosing the Right POD Platform for Embroidered Masks
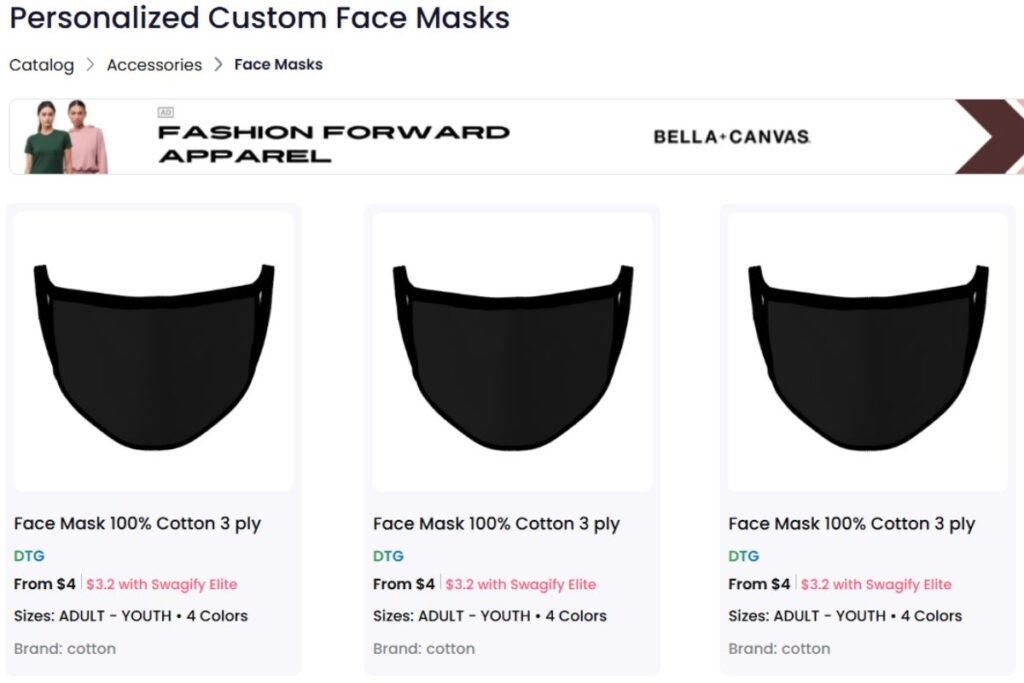
Embroidery is a specialized process—and not all POD providers offer it, especially on face coverings. So your first step is selecting a platform that meets both your creative and operational needs.
Top POD Options:
Printful
Printful is one of the few POD services that offers true embroidery, not just simulated stitching. Their integrations with Shopify, WooCommerce, and Etsy are seamless, and they offer professional fulfillment and packaging. However, mask options may be limited, so check their catalog for updates. Their design guidelines are strict—making them ideal for sellers focused on premium branding.
Printify
Printify partners with a global network of print providers. Some support embroidery services, and if they offer embroidered accessories (like hats or patches), you can use these to expand your product line. Be sure to contact providers within the Printify network directly to check mask embroidery availability.
Shirtee.Cloud
This German-based POD company allows in-house production and custom embroidery requests. They don’t always offer face masks, but they are a great option for businesses looking for more control over product customization. Contact their team directly to discuss special production runs.
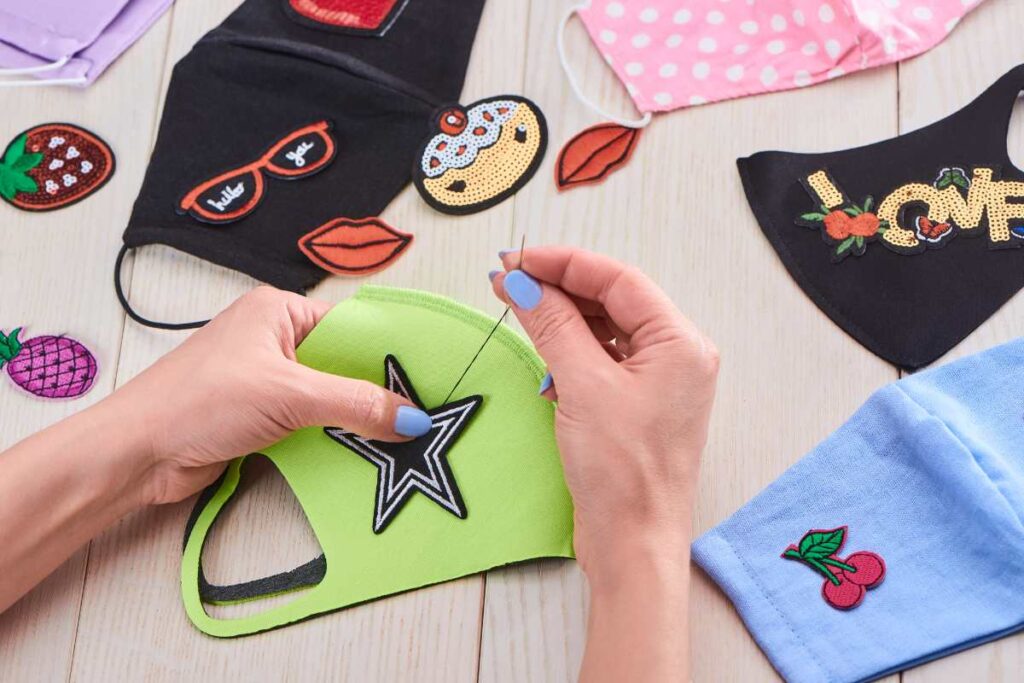
What If Masks Aren’t Available?
If embroidery on face masks isn’t an option today, pivot by offering:
- Embroidered patches that customers can iron on at home
- Matching embroidered accessories like caps, scarves, or totes
- DIY kits for mask customization (combine plain masks + iron-on patches)
This keeps your brand embroidery-focused while exploring creative angles to differentiate.
Step 2: Designing Your Embroidered Face Covering
| Design Element | Options | Considerations | Best Practices |
|---|---|---|---|
| Fabric Type | Cotton, cotton blends, linen, denim | Choose tightly woven fabric for durability and stitch hold | Use breathable fabric suitable for both wear and embroidery |
| Embroidery Type | Flat embroidery, 3D puff, appliqué | Depends on the design complexity and desired texture | Flat embroidery is ideal for masks due to comfort |
| Thread Type | Polyester, rayon, cotton | Polyester is strong and colorfast | Match thread quality with fabric and design style |
| Design Placement | Side panel, center front, lower corner | Avoid thick stitching near the mouth/nose area for breathability | Side placement ensures visibility without discomfort |
| Mask Shape | Pleated, contoured, 3D, fitted | Affects how the design will appear when worn | Test embroidery alignment before full production |
| Stitch Density | Light, medium, dense | Dense stitching can reduce fabric flexibility and breathability | Keep designs simple and not overly dense |
| Personalization | Initials, logos, floral, cultural motifs | Target audience preferences | Offer customizable options for names or messages |
| Backing/Stabilizer | Tear-away, cut-away, water-soluble | Needed to support stitches and prevent fabric distortion | Use lightweight backing to avoid stiffness |
| Color Combinations | High contrast, subtle tones, monochrome | Consider both thread and fabric colors | Ensure good visibility of embroidery |
| Care Instructions | Hand wash, machine wash on delicate, air dry | Embroidery threads may be sensitive to heat | Provide care label for longevity |
Embroidery requires precision and restraint. Unlike printing, where gradients and fine details are easy, embroidery stitches have physical limitations. You’ll need to design with stitching durability, thread count, and size in mind.
Best Practices for Embroidery Design:
- Use dedicated embroidery software like Wilcom, Embrilliance, or Brother PE-Design. These tools let you digitize artwork into formats compatible with embroidery machines.
- Keep it bold and simple. Fine lines and tiny text can get lost in thread. Avoid anything with a font size under 0.25 inches or lines thinner than 0.05 inches.
- Limit color count. Every color switch requires a new thread, which increases time and cost. Aim for 3–5 colors per design.
- Simulate before stitching. Most design software has a “stitch preview” mode to show you how the final product will look.
File Format & Size Guidelines:
Save your embroidery files in one of the following:
- .DST (most common)
- .PES (Brother machines)
- .EXP (Melco/Barudan machines)
Measure your canvas area accurately. Typical embroidered mask design areas include:
- Adult: 10.24 x 5.75 inches
- Teen: 8.24 x 4.44 inches
- Child: 6.24 x 3.15 inches
Keep your design centered and slightly raised from the edge for better aesthetics and comfort.
Step 3: Preparing for Production

Once your designs are digitized, it’s time to bring your first embroidered product to life. Even though POD handles production and shipping, you should still be hands-on with quality assurance.
What to do before launching:
- Order a physical sample. Don’t rely solely on mockups. Inspect the stitching, fabric feel, and design placement in person.
- Choose the right fabric. Embroidery works best on sturdy, non-stretchy fabrics like cotton or poly-cotton blends. Avoid soft or thin materials that may distort the stitches.
- Optimize placement. The best spot is usually centered on one cheek area or slightly off-center depending on the design.
Can’t find embroidery-ready masks?
Consider selling embroidered patches your customers can apply themselves. Iron-on or sew-on designs offer flexibility and expand your reach to crafters or event organizers.
Step 4: Set Up Your Online Store
| Step | Action | Tools/Platforms | Tips for Success |
|---|---|---|---|
| 1. Choose Your Platform | Select an e-commerce platform that suits your business size and budget | Shopify, Etsy, WooCommerce, Big Cartel | Start with Etsy for handmade exposure or Shopify for branding |
| 2. Buy a Domain Name | Secure a custom domain that reflects your niche and brand | GoDaddy, Namecheap, Google Domains | Use relevant keywords like “embroideredmasks.com” |
| 3. Design Your Storefront | Create a clean, user-friendly layout with your branding | Canva (for branding), Themeforest (templates) | Keep the design simple and mobile-friendly |
| 4. Add Product Listings | Upload high-quality photos, descriptions, and customization options | Your chosen platform dashboard | Use mockups + real photos, highlight embroidery close-ups |
| 5. Set Pricing & Variants | Define prices based on embroidery, size, color, and personalization | Platform settings | Offer tiered pricing (basic vs. custom designs) |
| 6. Set Up Payment Options | Enable secure and multiple payment methods | PayPal, Stripe, Razorpay, Cashfree | Include popular options based on your region |
| 7. Configure Shipping & Returns | Set delivery zones, shipping costs, and return policy | Shippo, EasyShip, Shiprocket | Provide tracking; offer free shipping above certain amount |
| 8. Add Legal Pages | Include policies like privacy, returns, shipping, and terms of use | TermsFeed, Shopify templates | Boosts credibility and compliance |
| 9. Connect Social Media | Link Instagram, Facebook, and Pinterest for marketing | Facebook Shop, Instagram Shopping | Showcase behind-the-scenes and user content |
| 10. Launch & Promote | Go live and start marketing with ads, influencers, or promotions | Meta Ads, Google Ads, Email Marketing tools | Offer launch discounts, free embroidery for early buyers |
With your design and product ready, it’s time to build a professional storefront. Whether you’re starting on Shopify, WooCommerce, or Etsy, your brand identity matters.
Key Store Elements:
- Branded URL & logo: Use a domain name that reflects luxury, craftsmanship, or purpose (e.g., “StitchShield.com” or “ThreadWear”).
- Mockups that sell: Use high-resolution images from your POD provider’s mockup generator. Close-up shots of embroidery build trust.
- Optimized product listings: Use SEO-friendly product titles like:
- “Premium Custom Embroidered Face Mask”
- “Personalized Cotton Face Covering with Stitched Logo”
- “Luxury Embroidered Reusable Mask for Events”
Write compelling product descriptions that highlight:
- Breathability and comfort
- Embroidery quality
- Adjustable features (ear loops, nose wire, etc.)
- Washing instructions to maintain embroidery
Include reviews, testimonials, or even a behind-the-scenes video if you can.
Step 5: Market Your Embroidered Masks
Embroidery appeals to a design-conscious audience, so your marketing should lean into storytelling, craftsmanship, and exclusivity.
Effective Channels & Tactics:
- Instagram & Pinterest: Share high-quality visuals and behind-the-scenes content of the embroidery process. Let customers see the detail and quality that goes into every stitch.
- Content SEO: Write blog posts and landing pages with target keywords like:
- Custom embroidered face coverings
- Luxury face mask branding
- Personalized stitched logo masks
- Influencer collaborations: Partner with fashion influencers, artists, or eco-conscious creators to showcase your masks in real life.
- Email marketing: Send limited-edition drops, seasonal design updates, and behind-the-scenes content to build a loyal subscriber base.
Upselling Opportunities:
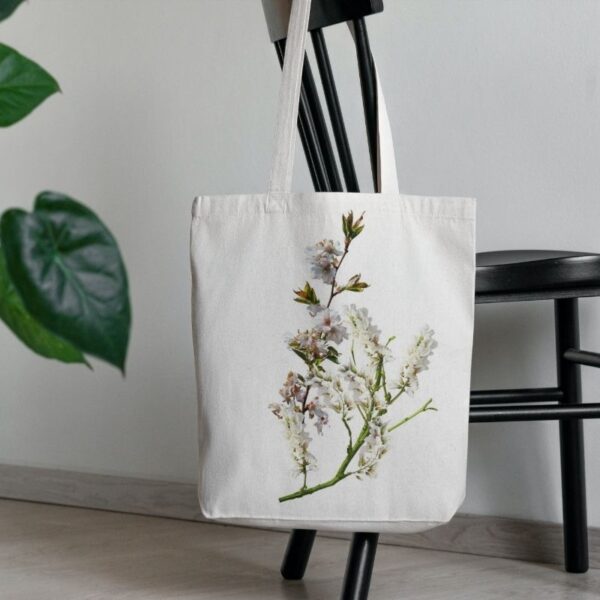
- Create matching accessory bundles like a hat + mask or mask + tote.
- Offer limited-time embroidered collections for holidays or causes.
- Use personalization upgrades, like embroidered initials or monograms.
Step 6: Fulfillment & Customer Experience
| Stage | Key Actions | Tools/Services | Customer Experience Tips |
|---|---|---|---|
| Order Processing | Confirm order, send acknowledgment email | Shopify/Etsy order dashboard, Mailchimp | Send immediate, branded order confirmation |
| Production Time | Embroider and pack masks as per selected customization | In-house or outsource embroidery | Be transparent about production time (e.g., 3–5 business days) |
| Quality Control | Check embroidery accuracy, stitching, mask quality before shipping | Manual inspection | Include a “Quality Checked by” tag or thank-you note |
| Packaging | Use clean, attractive, and eco-friendly packaging | Branded mailers, tissue wrap, care cards | Add a handwritten thank-you note or coupon for next purchase |
| Shipping & Tracking | Ship with tracking and send updates to customer | Shippo, Easyship, USPS, FedEx, DHL | Provide tracking number and estimated delivery date |
| Returns & Exchanges | Clearly define return/exchange policies | Store policy page + customer support | Make the policy fair, especially for customized items |
| Customer Support | Respond promptly to queries or complaints | Email, Chat plugin, WhatsApp Business | Aim for responses within 24 hours with a helpful tone |
| Feedback Collection | Ask for reviews, ratings, and suggestions | Google Forms, Loox, Judge.me | Offer small discount or freebie in exchange for reviews |
| Loyalty & Retention | Reward repeat customers and engage with them post-purchase | Email marketing, loyalty apps | Use personalized emails with new designs or insider previews |
| Post-Purchase Engagement | Share care instructions and styling tips | Email, Instagram, blog | Build trust and encourage social sharing |
Although POD platforms take care of order fulfillment, your reputation depends on customer satisfaction. As embroidered masks are a premium product, buyers expect superior quality, communication, and support.
How to ensure customer satisfaction:
- Regularly order test samples to check for consistency in embroidery and fabric.
- Monitor customer feedback and reviews. If issues arise, resolve them publicly and professionally.
- Provide clear washing instructions. Many customers don’t know how to care for embroidered fabric. Use your product packaging or follow-up email to educate.
- Offer fast, responsive customer service, especially when handling custom or gift orders.
Building trust and credibility around your product will encourage word-of-mouth marketing, repeat purchases, and positive testimonials.
Final Thoughts
Embroidered face coverings are more than protective gear—they’re wearable art. Whether you’re starting a niche fashion label, expanding a brand, or exploring new ways to deliver value through craftsmanship, POD makes it possible with minimal risk.
By combining high-quality embroidery with a compelling brand story, thoughtful design, and strong marketing, you can establish a successful and profitable custom mask business.
Ready to launch? Choose your POD provider, start stitching your first design, and enter the growing market of premium embroidered accessories.

Sign up